Wednesday 24 December 2014

Many Many Gifts!

The gifts are pouring in and out!

Off to the Mic Mac Tavern with a friend for lunch. We went early, as that place has had a never ending lineup since they moved next door. We did not avoid the lineup, and I trudged up to the hostess desk to sign in. That little angel looks up and exclaims "Mrs. M!". Ah, yes! Another one from my teaching past. We were seated promptly!

Now, isn't that the best gift? She remembered me, was pleased to see me and happy to be of help. As a teacher you're not always sure how these things will go. We walk a fine line at times. I loved teaching! It's wonderful to think that I made a good impression that is worth remembering. Especially wonderful when you are talking about children. They see to the bottom of your heart and soul at times. At least, the ones who need to do.

Next gift incoming was the Chanel vintage braid I was gifted by A Challenging Sew. Canada Post arrived at the door with this marvellous package! What an amazing thing to do! She doesn't know me. I'm thinking she knows only a few of her many admirers. Yet she took time to share some amazing gifts with her readers. I spend a lot of time pouring over her couture details and sew alongs. I need to honour this gift with an appropriate sew. I got out my best Chanel boucles and I'm not sure I have what I need. Dare I say I may need to shop on? Opinions welcome.

The braid does nicely on either side, giving options. The front one won't work. Will the braid be lost on either of the others?

Last night I brought my magical basket o'gifts to a family gathering. Cup cozies, Kleenex pack covers, ear bud cases, etc.  They were warmly greeted. I found it totally unexpected that some of the guys wanted Kleenex covers. Who knew? The nieces and nephews are all grown now. They have collected partners and these game souls come to these rather boisterous family events. What nice people they have all grown to be! I am so grateful for my family and family gatherings. 

Merry Christmas! Happy Festivas!

Wednesday 17 December 2014

Amy Sue

My cat died yesterday. She was 20. Today was a very long and quiet day. She will be missed.

Amy Sue Devil Child was more formally known as Amasis. She was a petite Abyssinian with lovely red fur. As a kitten she created a long list of firsts. She was first of her litter to purr, climb out of the box, scale the wall (and all of the subsequent wall extensions). She would also have been first born, but one of her brothers got in the way. She pushed him out and followed, for the first and last time in her life. She marched with teeny pink paws to her own drum. 

Amy tried modelling for a short time as a youngster. She was a fine example of why you don't take your hands off an Abyssinian at a cat show. The errant judge was severely disciplined. Her tetanus shot worked well, I understand. There was also those embarrassing incidents at the doctor's office. Amy was always one to hold others to a high standard. That scale was far too flimsy. Mama needed a tetanus shot update. That little velcro muzzle was fun. It's unbelievable no other cat had conquered that before!

Amy initially lived a quiet but full life with her brother (Percival), mom (Sam) and an aunt (Lucille) and uncle (Ben). She was the last of her family and therefore in her later years had to provide 5 times the feline needs of her servants. She greeted them at the door each day. Amy walked the driveway daily, if the temperature was right. Appropriate honour guards walked with her. Leaves were chased. Sticks were sniffed. We were allowed to sun with her on the patio, if the proper cushion was placed in the sunniest position - with a second cushion in the shade for heat regulation. Eventually, after the required 100,000 repetitions of "Don't eat that!" she even stopped eating grass (more or less). 

Her favourite activity was the constant monitoring of the fireplace. She kept it in perfect working order. She perfected the meow that turned it on and only fell off her fireside chaise when in the deepest of slumbers. Her figure was always excellent, although at times it was a battle to get her back up to almost 5 lbs. She was truly beautiful. 

Her purrs and her cuddles were given only to the most deserving, and those who received knew they were in the presence of something great. She will be missed. Deeply, fondly and with respect.


Wednesday 10 December 2014

Christmas Comes early!

I follow an excellent blog called A Challenging Sew. Leisa's reports on her trip to Paris with Susan Khalji is to drool for (go look, it's worth it), and her work with Marfy patterns has been really inspirational. Check her out. Great tutors and sew alongs. Today she brought me an early Christmas present! I won a lovely bit of Chanel trim! What an amazing gift! Now the lovely boucles aging in my stash are all calling out "pick me" as they sense some soon upcoming action. After Christmas, please. For now I will just check the mail box about 3 times a day. Even on Sunday. Just in case.

I have been working on Christmas presents. I often don't have a recipient in mind. I just make things I would like. Today I am sewing up Purl Soho pups. Little tweed pups put a smile on my face. The pattern fits together well and the instructional sequence makes sense. When you make little stuffies, these things are important.

I was working on Kathyrn Brenne's purse pattern, recently released through Vogue. Beware! You must use leather (or something like it) for all the outer pieces. I tried to get away with fabric for the main panels. It worked, but took a lot of luck and I'm not real happy with the results. I'm sure I saw an article by Kathryn on how to make this bag. I can't say the Vogue directions were much help. It's going in the 'give away' basket.

I went to a Lucy Neatby knitting workshop recently. She talked about how some people write patterns and some people write patterns to sell magazines, yarn, product. When I look at most of the independent patterns I have used lately I must say her point is well made. The directions are so well laid out and detailed. The cut of the patterns is unique and pieces fit together. The authors are a pleasure to deal with and so enthusiastic.

So, after fussing through the Vogue bag I went back to my pattern stash and tried out the Caliti Clutch. It's a free pattern from Sew Sweetness. Much better, thank you. I've tried several of her patterns and find them all to work well. In fact I just signed up for the Bag of the Month club on the ams site. I get a new bag pattern each moth for 6 months. Some of the designers I have sewn before. Sounds like fun!

Sorry. No pictures. Presents should remain under wraps. I will take pics and post them later.

Wednesday 26 November 2014

A Completely Different Bag

I finished the bag from my Japanese quilting book.  I love it! It's put together very differently from other bags I've made. The directions and techniques made sense and worked very well. The product has a different feel and looks and handles beautifully.

You make the front, back and side panels in sections, completing each before sewing them together. This would make for an excellent on the go project. The patterns come in sheets in an envelope in the back. I traced it off. The patterns are well drawn and very detailed if you want your project to look exactly like hers.

The Japanese style here includes lots of hand stitching and imperfect shapes, although she really leaves that up to you. I decided to go with machine stitching all throughout. It was easy to do that. The instructions are neatly laid out on the page and included good pictures. I like enough words and pictures without too much to confuse me. It was a good balance. However, I'm not sure there is enough there for a beginner sewer. Sometimes it's good to have something just for the big girls.

I followed the directions to make a bunch of log cabin blocks and then randomly combined them to make a panel for the front and the back. I used a line of fabrics that all went together nicely without any glaring colours or patterns (Persimmon by Basic Grey). Then you quilt this back and front panel to the backing. I wanted to try a heavily quilted look and stitched almost every line. I also used lots of decorative stitches and a light gray 50 wt Aurifil thread.

Then you quilt the side panel with a grid pattern. I wondered if I should put something heavier for an interfacing, but the close quilting seemed to do the trick.

Now you stitch the back and front to the side panel, add handles and then sew a facing to each side, encasing the top edges and handles. You stitch the facing to the quilted inside panels and use a binding strip to cover the inside seams. All done!

I have loved this book for its cover for some time. I have now made the cover bag and would love to work my way through the book. I probably will! However, I can really see how including handwork would be excellent. The finished bag has the feel of something you would keep for a long time, so not something you mind spending time on. These bags are perfect for this. I am also be challenged by the monochromatic colour scheme. My first bag worked out well, but mmmm, the possibilities! From the way this bag shaped up I'm really looking forward to trying the other shapes.

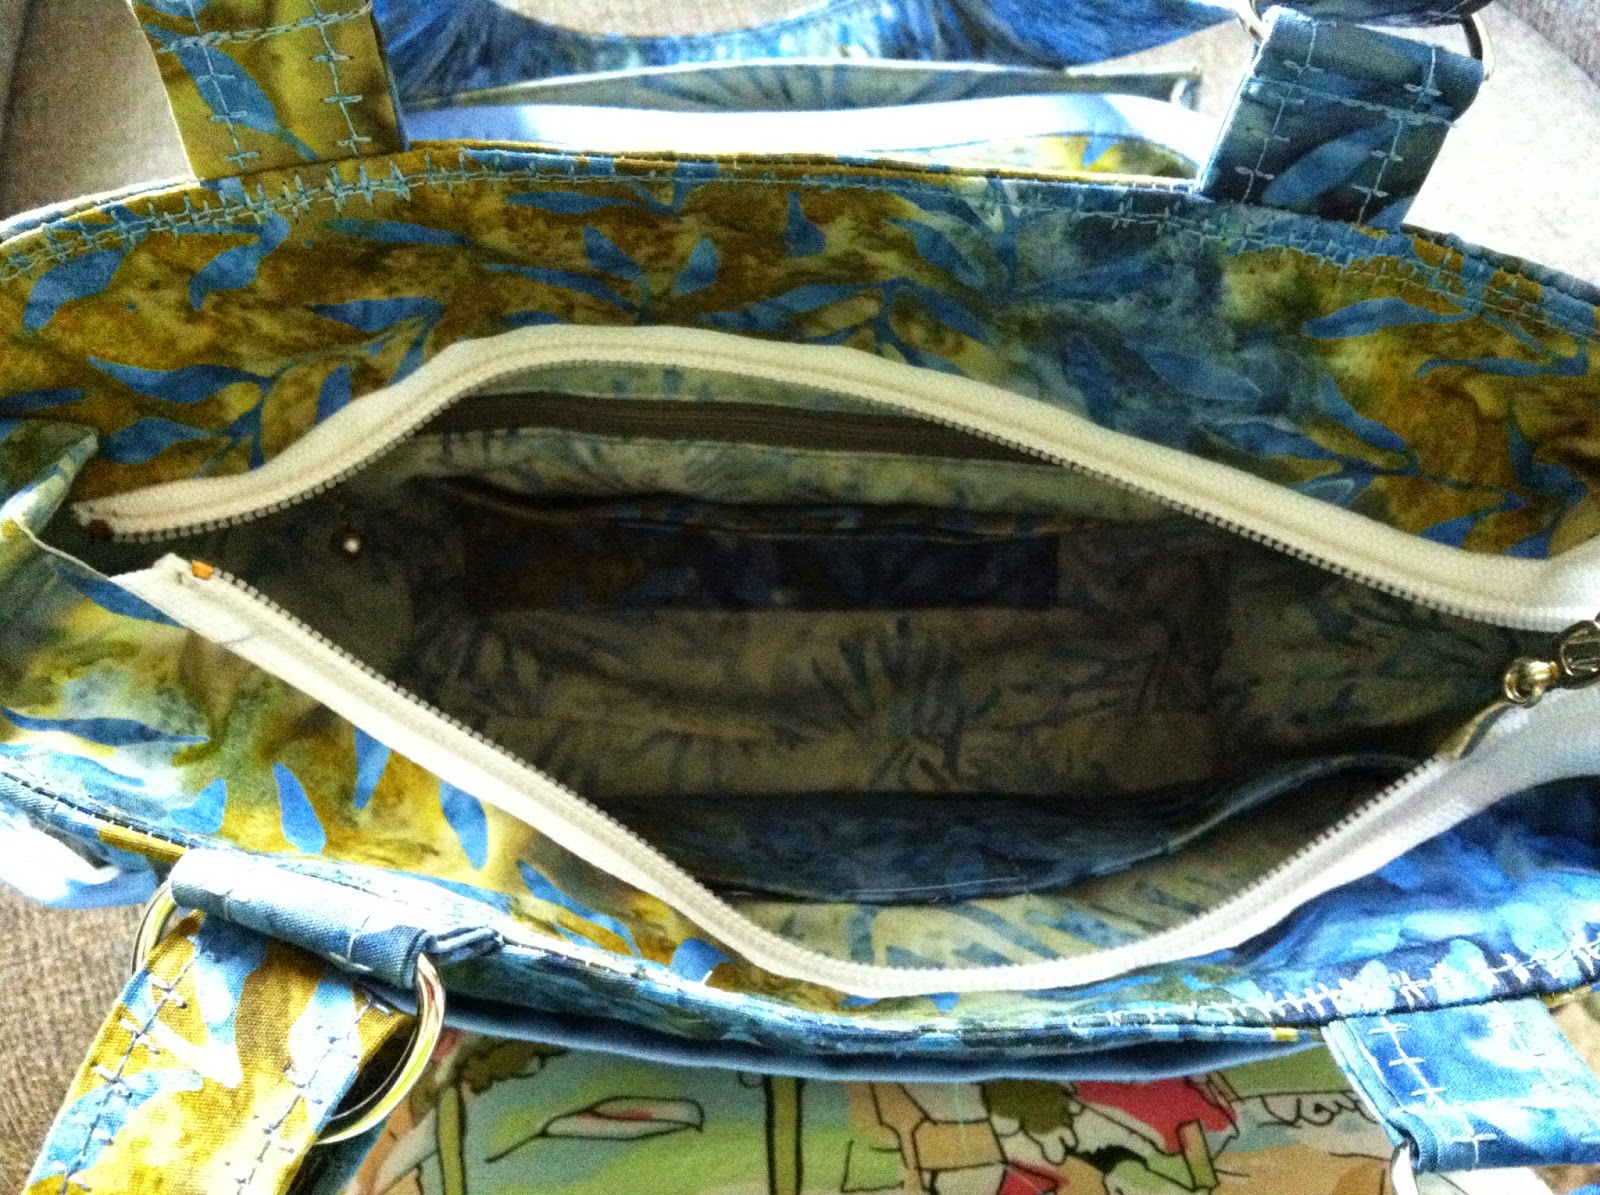
the inside - note the cream facing

 The outside

Monday 24 November 2014

3 days of bliss

The Atlantic Sewing Guild  had a 3 day sewing weekend and I made good use of this luxury. It gave me the opportunity to stock up on little Christmas gifts. It took me two nights to cut, plan and pack for the retreat but then all I had to do was sew.

I made cup cozies. Go to Starbucks. Ask for a cardboard cup cozy and use that as a pattern. As I am more a large Tim's tea drinker myself, I added a bit of wide elastic to join the end seams together. It's good to be flexible.


Then I went on to Kleenex cozies for the well equipped purse. I'd be lost without mine.


New this year was the ear bud case. I used a package of 5" pre cuts for these. I got the tutorial from Dog Under My Desk but made some changes in the directions. I like to do the cutting after I sew, so I traced the circle onto the inside lining after the zipper was inserted and the layers stacked. Then I sewed and cut. Much faster and more accurate in the end.

I only made one dog. I will need more dogs. The pattern from Soho Purl works very well and the pieces fit together nicely. Always stuff things one bit at a time and push it in firmly. Wobbly dogs look half finished. This is a great dog!


I bought a fabulous quilted projects book and I got part of a bag completed. I'll be working on that again next week. It is an incredible book - well laid out, perfect instructions, patterns included and detailed. I also bought the new Anna Mazur purse book and it has yet to impress me. I will give it a chance but it's back shelf for now.

The most fun I had was completing the new Tilton skirt. I had seen a review at Communing With Fabric and was pre warned that it was long. At 4' 11 1/2" I need to know these things. I went to my stylist (DH) and he vetoed the waistband. It was a wide and turned down band. He also wondered why the skirt needed a bump out to one side. I decided to cut out th medium, eliminate the waistband and hope for the best.

I was using a gorgeous double faced wool knit. It had great body and softness at the same time. Perfect drape for the project! Thank heavens for a sister in Montreal! How else could I sew?

I wanted to do single layer tailoring and make the skirt reversible. First I basted the s=kirt together and got the fitting experts involved. A retreat brings out the opinion in everyone and these were MOST welcome! Skirt too big. Skirt too long.

I recut to the size small. After auditioning many decorative stitches we decided on one and I put that skirt together with overlapped, stitched and then trimmed seams. I added  a narrow waistband of faux, stretchy leather with 1" elastic inside to give it body. Perfect! I then cut off about 3" from the bottom, which was a bit risky. The skirt structure does not lend itself to cutting at all. No hem treatment.  The fabric does not fray or run.

I love the skirt, but I think we are all still wondering why it has a big bump out to one side. It makes my twirls all wonky. I do like to twirl. As you can see it has 2 colours to choose from.

Now, do I have enough left over for a vest? The girls also say I need boots. Hmmm....


Sunday 9 November 2014

Tale of a Skirt

I finally finished the skirt from well below the earth's crust.

If I hadn't still loved it, right up to the last stitch, it might have been a wadder.

Let's also admit that every problem was really operator error.

I've made this skirt before so I really knew what I was up against. I got the idea from a Thread's article many moons ago, but didn't like the way they approached it. Still don't. My way is better, I just don't listen to myself either, at times.

The idea is to feature a fabric you don't want to cut into. My first skirt was a silk plaid. This time it was a Bali batik with border prints. I wanted to keep the border intact.

So you make a skirt yoke to fit you and then attach the skirt fabric to it. I took a strip of base fabric and measured out my hips and drew in a waist line, about 5" apart (as they are on me). I cut lines from the waist down to the hip line, about 5" apart. Its not an exact science. Then you overlap at these cuts to form dart like structures that create a waist to your measurements. You end up with a curved skirt yoke that fits you.

Of course you may also have a skirt pattern that fits and does this for you. I needed to spend needless time on a fool's errand, apparently.

Then you cut the darts so the dart fold is gone and use a fusible interfacing to hold the whole thing together. It's flat that way. Now you have a base to attach the fabric to. I also added a second layer of fusible (not shown here) to give more strength.


Important! Now sew in the back seam, up to where the zipper will be. If you don't you will spend a HUGE amount of time draping, sewing, ripping and resewing that seam until it lies flat. I knew that from last time. There is no excuse. I refuse to discuss this further. No point.


So roughly divide the skirt fabric into nice units. Divide the waist into the same number of units. Maybe 14? Mark these units with something removable.  Pin the skirt to the skirt yoke, matching the units. You will have more skirt fabric than yoke. Now relax, and start smooching that excess fabric to the skirt, making little or big pleats that flatten the excess out. Don't be too particular. You are looking for a bit of a gypsy flair.


Baste these folds down. Leave the seam allowance for the zipper alone and don't send any folds in that direction. Get out your threads and fancy sewing machine feet and maybe some trims and start stitching that yoke down. Again, go for a gypsy look and keep your lines wandering. I enjoyed that part muchly. You really can't overdo it. The yoke will give you stabilization. Stick in a zipper. Add a waistband or waist facing. Wear!


Do you know batiks? Quilters use them a lot. They are lightweight, smooth and gorgeous! They also don't seem to fray and are quite stable and on grain. The selvedge is smooth and I could use it for the hem without any wrinkles or pulling.

Thursday 6 November 2014

With Just Their Teeth!

I was walking in the park a week ago with a friend and we noticed a tree down near the entrance. We took a closer look and determined that it was the work of an industrious beaver.


Fast forward a week and here is what you get.


Many more trees down.

Water well up to here. The Forest Hills extension is threatened!

Streams are morphing into ponds.


That's what you get when beavers move into town. They're like biker gangs. Tough, and they only come out at night. Can you believe what these little guys do with their teeth? Their teeth!!!!


Tuesday 7 October 2014

Ugly T-Shirt Makeover

First let me mention that I needed to dress for a thing the other day and after several outfits were rejected and flung across the room I came to the conclusion that I need a new wardrobe.

A whole new closet full of clothes that I like, that fit and look amazing on me. I'll get back to you on that topic. Any suggestions?

I have ugly t-shirts. I look dreadful in a crew neck and yet I get these shirts at events that I want to wear for various reasons. So I wanted to find a way to redo the neck easily (who wants to spend more time than the shirt is worth?). It also happens that they are always too long for me. New neck and hem please.

Side bar: Nothing takes an outfit down faster than sleeves or hems that drag. Frumpy. Very frumpy. 

So happily the 2 alterations go together. First cut off the hem. The nicely pressed folded edge will come in handy.

Now find a neckline you like on some other garment or pattern. Trace it onto paper so you can make other adjustments and make notes about what works. A curved ruler should always be close at hand to smooth curves. Trace both front and back, people! 


Really all that is required is a nice line that doesn't take off too much. The neckline patterns need to include about 1 cm seam allowance. Just recognize that the opening will end up 1 cm deeper and wider than you cut. Trace the pattern pieces onto your t-shirt. Make sure the back and front pattern pieces align at the shoulder edges and that they are centred. Cut away the old neckline. Deep breath. It's only a shirt!

Trim the hem fold you cut off to 1/2". You can adjust this amount as you see fit. I was looking for 1/4" edge showing when the neckline was completed.


 Pin that folded, trimmed edge to the right side of the cut neckline. The fold faces the garment - raw edges together. 

 Sew the edge to the neckline with a tiny zigzag stitch at about 1/4" seam allowance. Don't use a 1/4" foot as you make zigzag your way to a broken needle and/or foot. (Yes, done that.) Give the edging a bit of a pull to make it lie smoothly when done. My fabric was quite stable so a slight pull was all it needed. More stretch, more pull required.

 I started at the back and used this You Tube video to make a mitred join when I got back to the beginning. I have tape on the deck of my machine that lines up with the needle. I use it to guide the bottom edge in a straight line when I'm doing bias or triangle seams. If you look closely you can see the bottom fabric corner is following the tape line. Here we are - all done step one!


 Turn the new neck edge to the inside and topstitch it in place from the right side. Use a stretchy stitch. A plain tiny zigzag will do, but I went with a decorative stitch. Again, the fabric was stable enough that I didn't need a stabilizer underneath. I was living on the edge! Then remember to zip up a new hem. I used the same decorative stitch. So match/matchy!


Saturday 20 September 2014

Dusting in Blogland

It seems people do read me occasionally. Who knew? I have been complimented on my list of goodies on the web, which means I now have to update that page as I believe it's pretty dusty.

There is so much goodness out there, and I really appreciate the efforts of those who post their ideas and projects. I respect their idea ownership and try to give credit where credit belongs. When people also sell patterns I purchase from those whose free patterns worked out well. I prefer bricks and mortar stores, but after midnight, what's a girl to do? I do both.

The Great P and I have been teaching a quilted jacket class for the last 2 weeks. It has been a huge amount of fun. Sewists are the best people to spend a day with, and although teaching does wipe you out it is good. The students have all been great sewists (sewers just doesn't look right, people) but each came with their skills in their own particular direction. Some were quilters, some garment makers, some embroiderers - all looking at the project from that view point. It really brought home that I tend to take certain knowledge for granted. Just because someone is a perfect stitcher doesn't mean they have ever eased in a sleeve, and that has its own bit of finesse required. I need to be more detailed in my instructions. What an excellent job they all did, in spite of my best efforts to mess them up!

I love this time of year! The clear skies and cool nights just make me run to my jelly cupboard and admire my jars. I nest in the fall. Robins in the spring, me in the fall.

The sewing room is a real mess. Yep, even more that before! I just handed in 2 projects to my quilting guild and they were intense. As a fund raising charity project we were given a kit of fabric and told to come back with a result worth at least $25. It then gets sold at a show October 2-4 at the IWK . Now, everyone run out and bid a bizillion dollars on my bag o'bags.

It was a lovely crisp fall evening and you meet friends downtown for a cold one. A handsome stranger approaches and your eyes meet! Ooooh! 

S/he inquires as to your availability for a date, that night, but travel is required. 

"Not a problem" you say (after googling the date's credentials and marital status). "I always carry a travel bag in my Porsche. 

And here it is!

A cup cozy and mug mat for the stylish tray table as you fly off to Paris.


A travel wallet in which to tuck your passport, First Class boarding pass and receipts to prove what a bargain you got on the Chanel jacket.


Luggage tags. 


A teeny wallet to tuck away your shopper reward cards for the airport shops.


A zipped wallet that can double as an evening clutch.


A perfect, unique tote for daytime travel.


A backpack to tuck all this into - that then rolls up into the outer pocket as a shopping bag for the tote. (I forgot to line the tote pocket, so it's a bit ugly when you do that, so don't.)


And let's not forget - a tissue holder to hand to him/her when you decide to dump them.


And that is how I plan to raise a bizillion dollars for the IWK.

Now to really push the pressure, the guild also had a September Challenge due the same night. We were given a random quilting magazine in May and told to come with something made that was inspired by that magazine.

I was not inspired. I did hear of others making a quilt block or something else small. I should not have believed any of them! The results I saw at the meeting were incredible!

I decided to go well beyond a simple single block and made 4 complete, full sized quilts - exactly as represented in the magazine.


So I got out my T-shirt transfers, photocopied 4 quilts from the magazine and quilted them each perfectly! Four little miniature colour quilts. I believe this may be the best cheater quilts I've ever done!

You get away with this kind of nonsense once, right? I enjoyed it immensely! May I take a bow?

Wednesday 3 September 2014

The First Day of School

Today being the first day of school a group of retired teachers got together for tea and crumpet. It was lovely!

I knew people, and I was quite prepared to know no one. We caught up and the air was all atwitter. It was lovely to see people and reminisce.

There seemed to be a bit of a divide. Some people are quite busy being grandparents. Some people have taken up new exercise routines. Some people have no idea what to do, and find it all very confusing. They've been retired for years and feel like it has been wasted time. They want to make a new life, but don't know what that looks like yet.

Think of the changes we've gone through. We had a 'very bossy, in charge, make it happen' job for a long time.  We worked with other people just like us. We got up every morning, dressed for success and roared off to earn the daily dog bone.

Some of us have gone from parenting to observing grown children at a distance. Our houses are too big and don't suit our new circumstances. Should we dump it all for an apartment? Condo? Money is a little tighter but our expenses have shifted, and our financial needs are still evolving to fit retirement.

And we don't know what to do with our day. We don't know how to revalue what we do end up doing.  Is it OK to read the paper till 11? What if I don't finish the Sudoku? If I read all afternoon am I lazy? Am I wandering aimlessly through life? Is this all there is? Teachers are so driven and expect so much from themselves. It's hard for us to relax and breathe.

My first year was way too busy. I wanted to do everything! My eyes were huge and there was so much candy to try. I have always liked to try new things and retirement gave me the opportunity to do that. I took classes. I learned to make bobbin lace. I sewed and made baskets. We travelled during the school year! I volunteered in a classroom. I volunteered with Grannies. If it was new I wanted to try that. My days were quite full. I often left parts of the paper unread. I felt a bit rushed.

Now I still do lots of things, just in moderation. I have to keep myself in check. I still want to do everything. My eyes are way to big for my calendar, and I'm finding I like to move slower now.  I like to finish the paper. Having my part time job is excellent! I get to dress up and see new people. I am helpful (I hope) and it's a whole new world without any of the real responsibility of my last job.  It starts at 10 - no early mornings!

I find myself looking at things more carefully and deciding not to do everything I want to do. I am giving myself permission to live slower and more thoughtfully. I savour the day.  I stop and sniff roses. Happiness is in the small things for me. With another 30 or 40 years I may get the hang of this yet. I'm learning to let go of my own driven expectations.

How are you doing? How has your life changed?


Sunday 31 August 2014

Blackberries

I think I spilled something on my keyboard. I'm having trouble with n and l. Note to self; you are a slob. Had to type the previous N twice.

My blackberry patch is bursting forth! They are fat, sweet and juicy! You need a full rain suit to collect them; the thorns are vicious! They fruit over several weeks, so you can keep picking, and picking....

I don't actually own the blackberries. It's a vacant lot next door. If they ever decide to build we will have to strike a deal. Or they will find a bare patch of earth some morning where thorns used to be.

I just finished a purse for the store. It's the Ursula pattern by the same people who brought us the Professional Tote. Therefore the directions are excellent and detailed, but you have to read them. I like lots and lots of pictures. They give enough pictures and fill in with time consuming words. ADHD anyone? However they write well and don't leave anything out. Good for any level of sewer.

The design is really well done. It's got everything a purse could imagine. There is a wallet pocket with flap on the outside. It has little flanges to keep everything from falling out. It has an inset zippered top. I haven't inset the zipper like this before and it works nicely. They include little exterior side pockets and lots of little pockets, inside, outside, zipped and not. I used some Inspira Decofuse to really stiffen the straps and bottom. It seems Pellon has a stiffener with the same name. It's not the same thing.


I mentioned the Ledwidge Lookoff Rally last post. It went very well! I was a fashion plate in my altered Official t-shirt. Those event t-shirts with bulky crew neck are not in the least bit chic.  They're also too long. I rearranged the shirt in about 10 minutes - necessary as I altered the wrong shirt the night before and had to do the right one at 5 am the next morning. Full instructions in the next post. I also have a great use for ugly event shirts you no longer want. Coming soon as I get the pics done!